Mod Skin Jinchuuriki Ekor 1 Gaara
Via Google Drive / Mediafire / Mega
Mod Skin Jinchuuriki Ekor 2 Yugito Nii
Mod Skin Jinchuuriki Ekor 3 Yagura
Mod Skin Jinchuuriki Ekor 4 Roshi
Mod Skin Jinchuuriki Ekor 5 Han
Mod Skin Jinchuuriki Ekor 6 Utakata
Mod Skin Jinchuuriki Ekor 7 Fu
Mod Skin Naruto Kyubi Ekor 1
Mod Skin Naruto Kyubi Ekor 4
Mod Skin Naruto Kyubi Ekor 6
Mod Skin Naruto Kyubi Ekor 9
Mod Skin Raikage Edotensei
Mod Skin Mizukage Edotensei
Mod Skin Guru Asuma Edotense
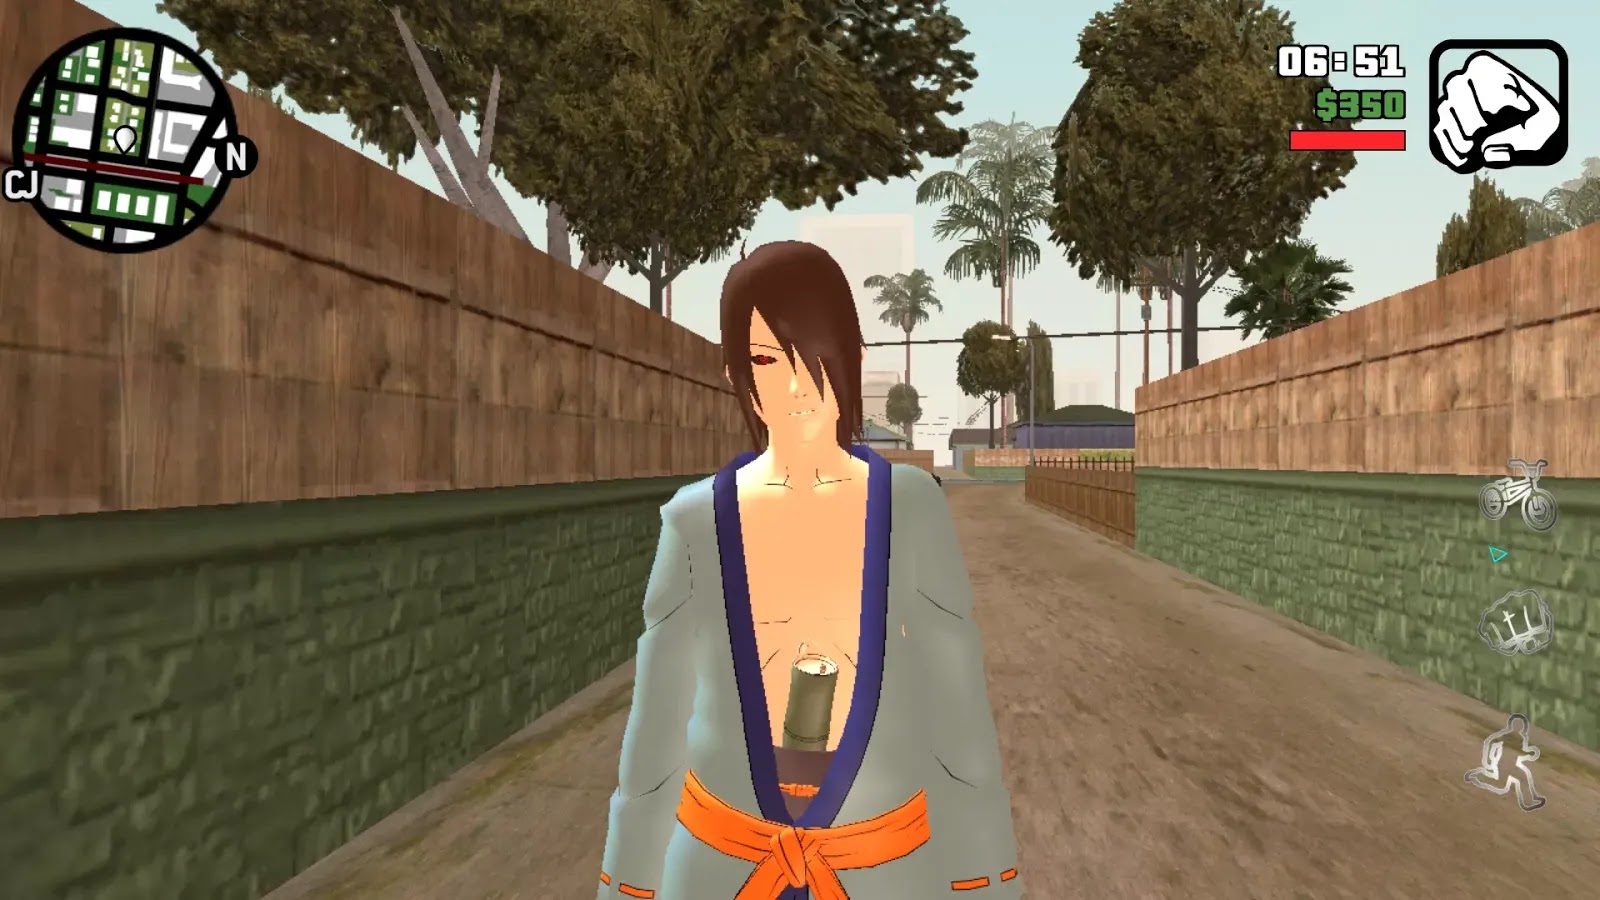
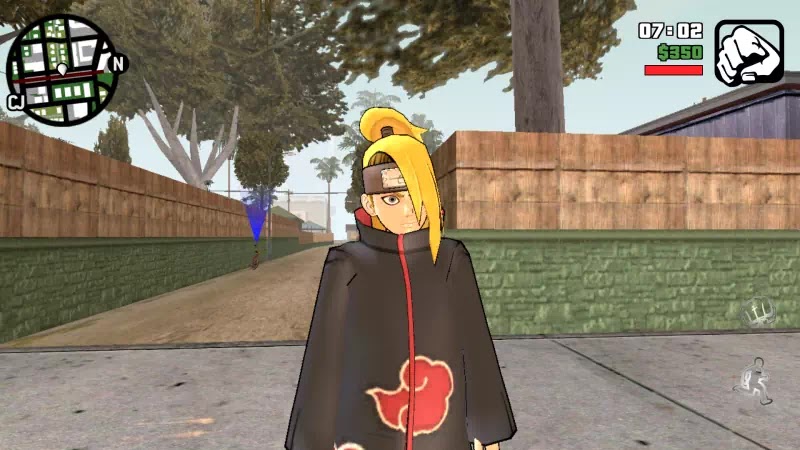
Mod Skin Akatsuki Deidara
Mod Skin Akatsuki Deidara Edotense
How to Install the Naruto Mod Skin On Android
Here I will make a written tutorial How to Install the Mod Skin with the Mod Files Containing Dff and Txd for GTA SA Android. Just direct the tutorial as follows.
1. Here I am practicing installing the Naruto Kyub 1 Skin Mod Skin through Android which will replace the "truth" skin (actually it can be with other characters besides truth), Open the Naruto Kyubi Tail 1 Mod Skin file using the zArchiver app, then look for the file format * .dff and * .txd. We only need 2 files. Then extract it to any place.
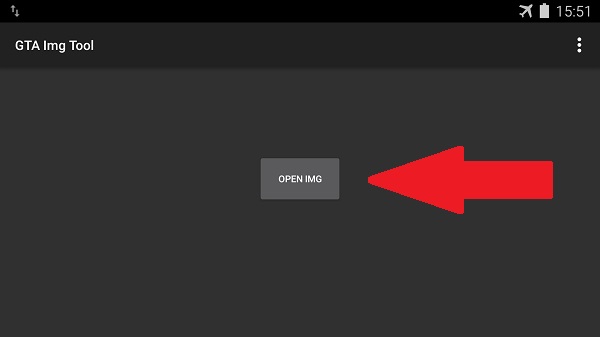
2. After extracting, now open the IMG Tool app, then select "Open IMG" as shown below.
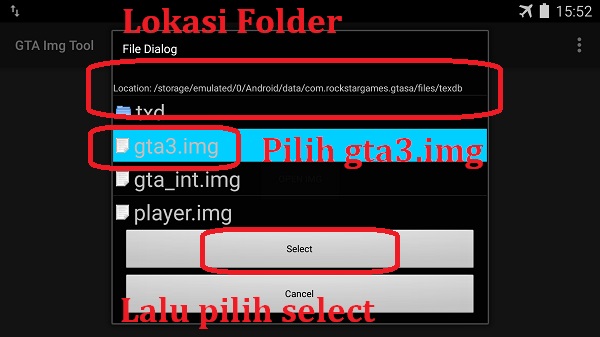
3. Then navigate to the internal folder / Android / Data / Com.rockstargames.gtasa / Files / Texdb. Then select the gta3.img file and select "Select". Like the following picture.
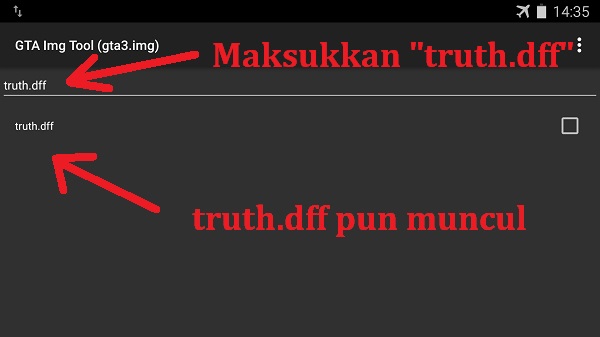
4. In the search column, enter the word "truth.dff" so the skin truth file that we will replace with Naruto skin will appear. see the following picture.
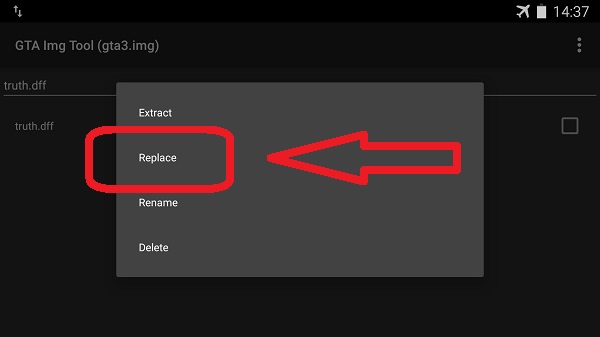
5. Click and hold on "truth.dff" then select the "replace" option.
6. Now look for the Tail1.dff format file where we extract the mod file, then "Select". Wait until it's finished, after that we exit the IMG Tool application.
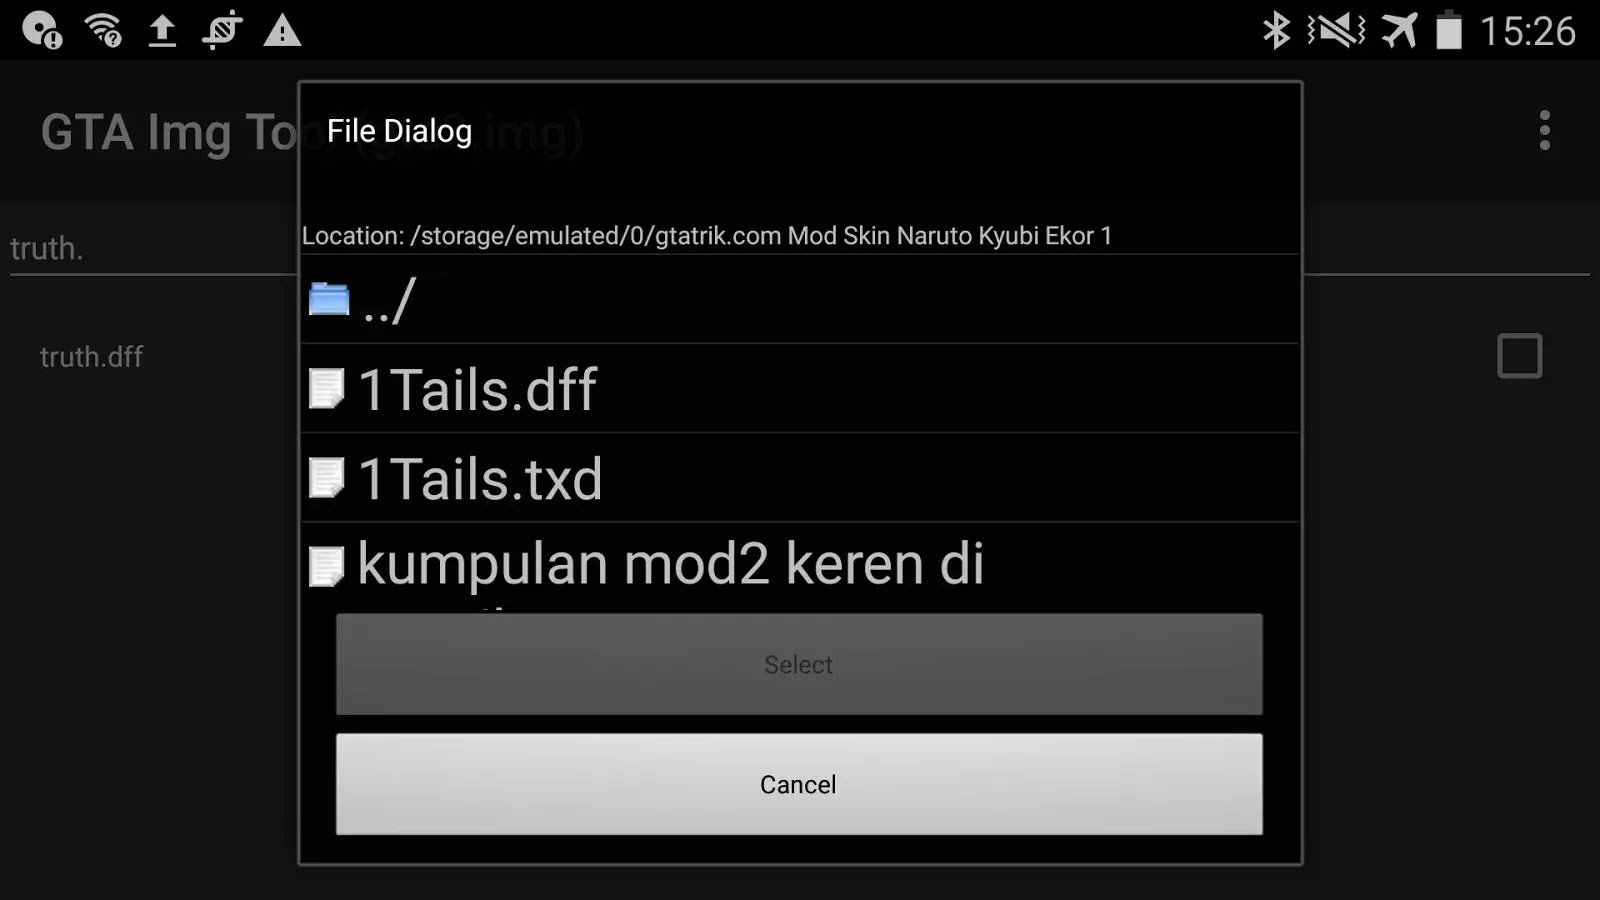
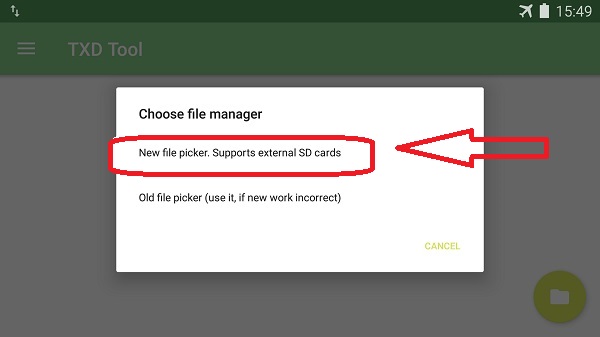
7. Now open the TXD Tool app. Then click the folder icon in the lower right corner. See the following picture.
8. Then select "New File Picker, Support External SD Cards"
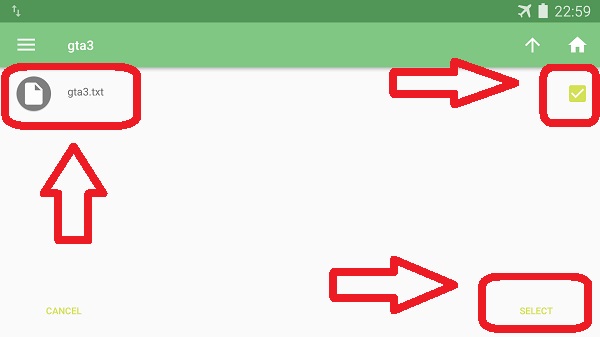
9. Then navigate to the internal folder / Android / Data / Com.rockstargames.gtasa / files / textdb / gta3 /. In the folder "gta3" there is a file "gta3.txt". Click check then click "Select". See the following picture.
10. Then open the contents of the gta3.txt file that contains textures. Add texture by clicking on the image icon in the lower right corner, then select import "From TXD Archives". Then look for the Tail1.txd file where we extract the file, look for the .txd file format and then "Select". Check "Overwrite", don't check "Enable Camnorm", Texture Resize 512 Pixels.
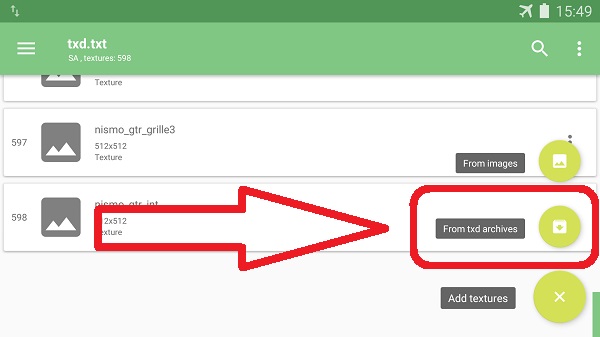
11. If it is done, then the mod installation stage is complete, to bring up the characters use the Cleo cheat "Skin Selector". Look for the truth skin on the Cleo cheat, then choose a skin. Like the following picture.
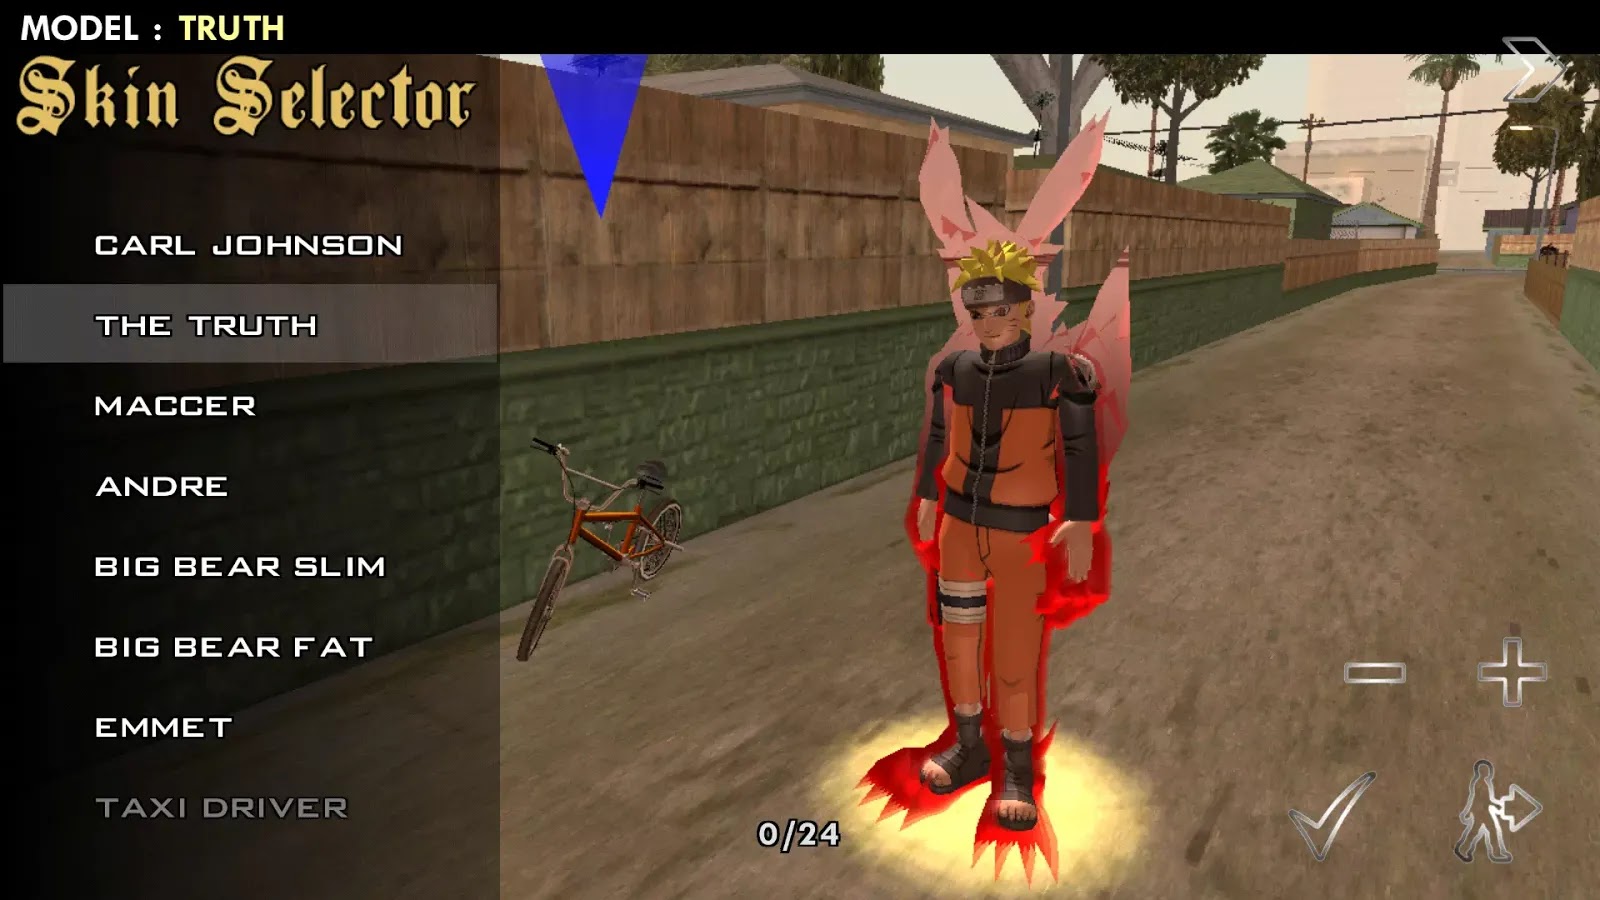
12. Then the CJ character will change to the Naruto Kyubi Tail 1 character.





0 Response to "Download All Mod Skin Naruto For GTA SA Mobile IOS Android And PC"
Post a Comment